In combination with Fastly and Google Cloud Storage we are now able to deliver an end to end experience, from encoding to streaming to playback, that can easily compete with YouTube and Netflix
Bitmovin enables high quality video streaming on the web with the smartest video encoding service and HTML5 adaptive player on the market. We utilize cutting edge standards such as MPEG-DASH and HLS in combination with our adaptive streaming algorithms and encoding solutions that are based on years of research in the adaptive streaming area. In combination with Fastly and Google, we are able to deliver an end to end experience from encoding to streaming to playback that can easily compete with YouTube or Netflix.
Your Workflow with Bitmovin, Fastly and Google
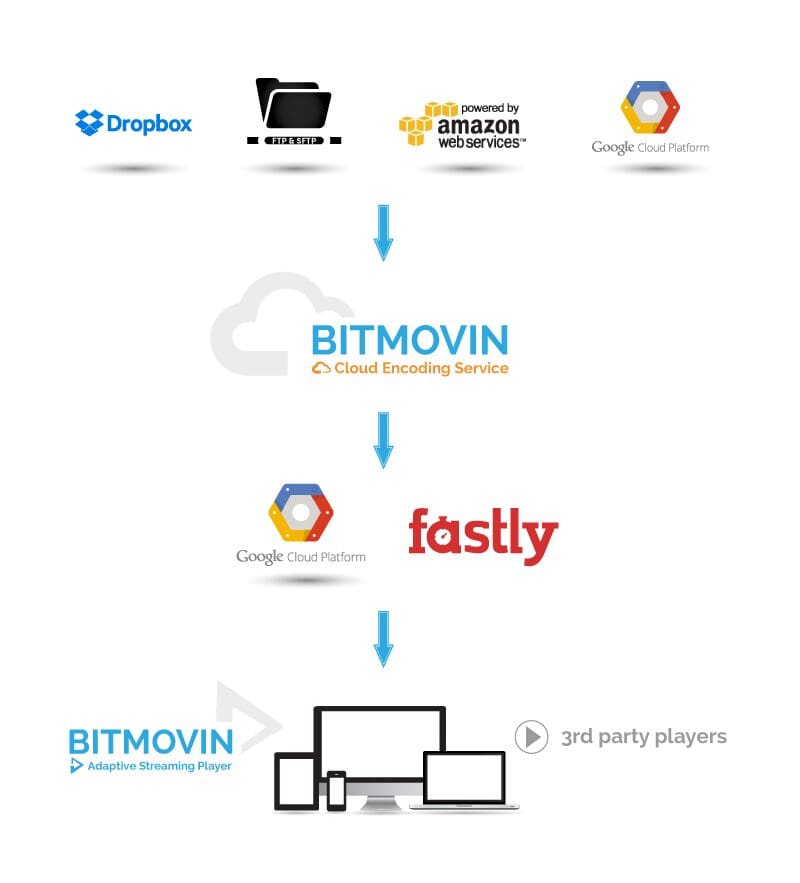
The workflow with Bitmovin, Fastly and Google is as follows. Your input video (the video that you want to make available on the web) will be added to the Bitmovin encoding service through HTTP, FTP, Google Cloud Storage, Amazon S3, or Azure. This can be achieved by using the web portal or our encoding API. Your video will then be encoded and prepared for web playback in a way that it loads fast, does not buffer and can be played back in the highest possible quality depending on the bandwidth of your users.
The next step is that you then transfer your encoded video to Google Cloud Storage which directly connects to Fastly with their CDN interconnect. The Google CDN interconnect enables selected CDN providers such as Fastly to connect directly to Google’s edge network. Customers wbenefit from reduced costs as the CDN interconnect traffic is much cheaper than regular egress traffic and increased performance.
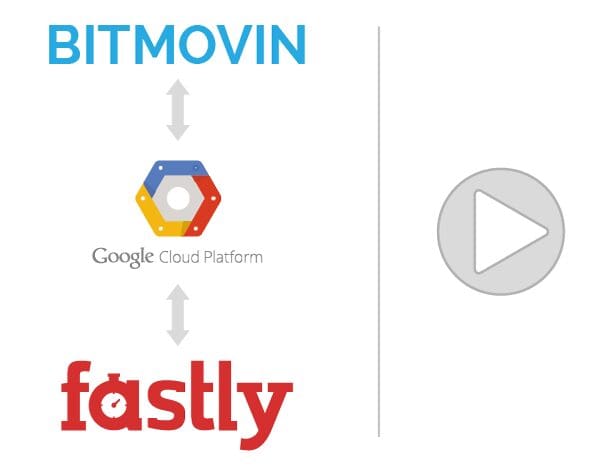
Google Cloud Storage acts as origin and Fastly delivers the videos to your users. The components of this chain (Bitmovin, Google, Fastly) work together tightly and their performance guarantees the fast loading time, no buffering and highest quality for your users. If one component of such a chain is not performing well, this will spoil the whole user experience!

Setup Bitmovin Video Encoding
Basically you just need to create an account or if you already have one just log in. We offer a free plan with 2.5GB of free encoding, that’s great for testing and integrating our service into your app – no credit card required – no matter how long it takes.
After that you can follow our general getting started guide. After encoding you need to create a Google Cloud Storage Output as described in the following sections.
Create Google Cloud Storage Output
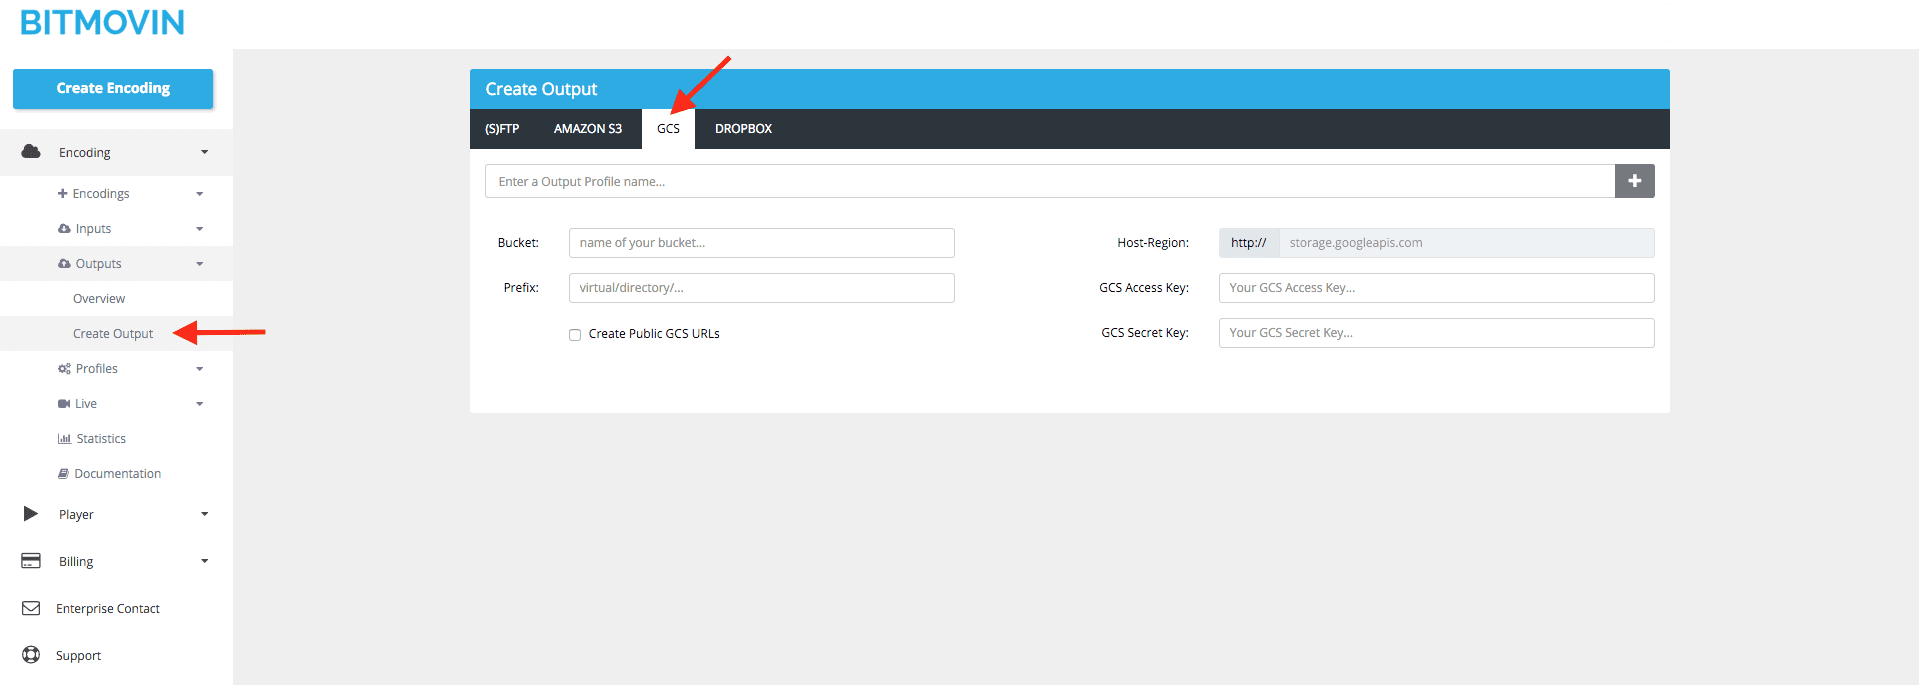
They output the created points to your Google Cloud Storage bucket that will be used as an input for Fastly. You can select which bucket you want to use, as well as the folder (prefix) and whether you want to make this content public or not. Here you can see an example:

Transfer Encoding to Google Cloud Storage Bucket
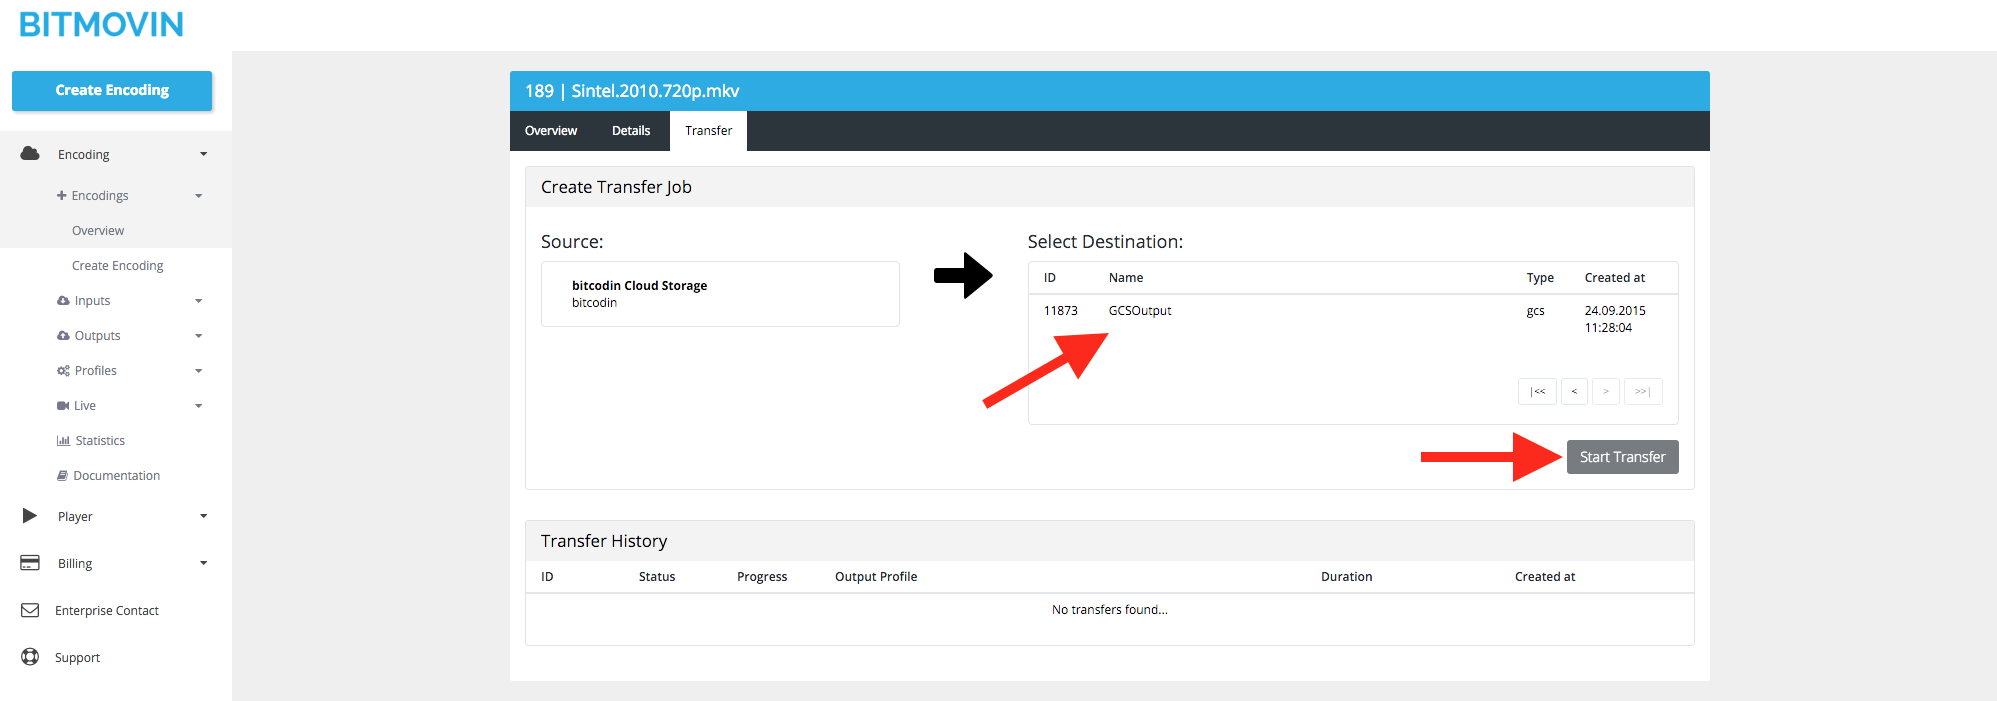
Now you need to go back to your encoding and select the transfer tab on the top. The next step is that you select your already created Cloud Storage output and just hit the Start Transfer button. Your encoded video will now be transferred to your bucket including all qualities (representations/renditions) as well as metadata, e.g., MPDs and M3U8s.

API Example
The same steps can be achieved through our API or with one of our API clients with a few lines of code, e.g. PHP:
PHP Example Code
/* CONFIGURATION */ Bitcodin::setApiToken('insertYourApiKey'); $inputConfig = new HttpInputConfig(); $inputConfig->url = "https://eu-storage.bitcodin.com/inputs/Sample-Input-Video.mkv"; $input = Input::create($inputConfig); /* CREATE OUTPUT CONFIG */ $outputConfig = new GcsOutputConfig(); $outputConfig->name = "TestGcsOutput"; $outputConfig->accessKey = "yourGcsAccessKey"; $outputConfig->secretKey = "yourGcsSecretKey"; $outputConfig->bucket = "yourBucketName"; $outputConfig->prefix = "path/to/your/outputDirectory"; $outputConfig->makePublic = false; $output = Output::create($outputConfig); $encodingProfileConfig = new EncodingProfileConfig(); $encodingProfileConfig->name = 'MyApiTestEncodingProfile'; /* CREATE VIDEO STREAM CONFIGS */ $videoStreamConfig1 = new VideoStreamConfig(); $videoStreamConfig1->bitrate = 4800000; $videoStreamConfig1->height = 1080; $videoStreamConfig1->width = 1920; $encodingProfileConfig->videoStreamConfigs[] = $videoStreamConfig1; $videoStreamConfig2 = new VideoStreamConfig(); $videoStreamConfig2->bitrate = 2400000; $videoStreamConfig2->height = 720; $videoStreamConfig2->width = 1280; $encodingProfileConfig->videoStreamConfigs[] = $videoStreamConfig2; $videoStreamConfig3 = new VideoStreamConfig(); $videoStreamConfig3->bitrate = 1200000; $videoStreamConfig3->height = 480; $videoStreamConfig3->width = 854; $encodingProfileConfig->videoStreamConfigs[] = $videoStreamConfig3; /* CREATE AUDIO STREAM CONFIGS */ $audioStreamConfig = new AudioStreamConfig(); $audioStreamConfig->bitrate = 128000; $encodingProfileConfig->audioStreamConfigs[] = $audioStreamConfig; /* CREATE ENCODING PROFILE */ $encodingProfile = EncodingProfile::create($encodingProfileConfig); $jobConfig = new JobConfig(); $jobConfig->encodingProfile = $encodingProfile; $jobConfig->input = $input; $jobConfig->output = $output; $jobConfig->manifestTypes[] = ManifestTypes::M3U8; $jobConfig->manifestTypes[] = ManifestTypes::MPD; /* CREATE JOB */ $job = Job::create($jobConfig); /* WAIT TIL JOB IS FINISHED */ do{ $job->update(); sleep(1); } while($job->status != Job::STATUS_FINISHED && $job->status != Job::STATUS_ERROR);Enable CORS and crossdomain.xml on the Cloud Storage
To stream MPEG-DASH content through HTML5 you need to enable “Cross-Origin Resource Sharing” (CORS). Just follow the Google documentation. An example CORS configuration could look like this:
[ { "origin": ["*"], "responseHeader": ["application/json"], "method": ["GET","HEAD"], "maxAgeSeconds": 3600 } ]Setup Fastly with Google Cloud Storage
Fastly provides a setup guide to how you can connect your Fastly account with Google Cloud Storage. Basically Google Cloud Storage will be used as an origin and it is also possible to configure it with private content. Besides that it probably makes sense to setup the Fastly origin shielding that protects your application servers from continuous requests for content.
Setup the Bitmovin Adaptive Streaming Player
For this setup it’s best to host the Bitmovin player on Google Cloud Storage so that it is delivered with Fastly alongside the media files. You can follow our self hosted player tutorial which shows how you can host the player on your server, cloud storage such as Google Cloud Storage or directly on the CDN.
After you have uploaded all files to Google Cloud Storage and configured the player correctly you should see your video playing through Fastly with the Bitmovin player.Summary
Delivering videos on the internet in a way that they load fast, do not buffer and play in the highest possible quality is a complex, resource intensive and time consuming task. But with Bitmovin, Fastly and Google you can setup a Netflix like streaming experience in just a few steps.
You have no fixed infrastructure costs for encoders, origin servers and bandwidth as every component scales with your volume. We continuously improve our encoding service and player which means you do not need to buy hardware year after year to stay on top. Streaming services that use cutting edge streaming standard such as MPEG-DASH and HLS need specialized knowledge to configure and use this standards effectively, otherwise you will not receive the benefits that are promised (low startup delay, no buffering, high quality).
The Bitmovin encoding service can be seamlessly integrated into your workflows through our API clients and REST API for encoding. Same applies for our HTML5 adaptive player which offers a comprehensive JavaScript API that can be used to fully customize the player as well as the skinning to your needs. If things are unclear you can take a look at our tutorials and if you don’t see what you need, please feel free to contact our support for direct help.


